- Regist
- 11-03-2024
- Poruka
- 3,681
- Reakcije
- 83
- Bodovi
- 216

How to Increase WordPress Memory Limit?
Here’s a scenario for you. You’re adding cool content and media to your website to make it more captivating and user-friendly. Then suddenly, you see the message: “Fatal error: Allowed memory size exhausted”. It can be quite disheartening to see when you’re trying to create and launch a high-quality WordPress website.
Well, believe it or not, we’ve all encountered the WordPress memory limit error. It is, in fact, a prevalent cause for one of the most common WordPress errors, the White Screen of Death. So, how to increase WordPress memory limit?
With help from our WordPress developers, I have compiled a list of methods you can opt for to increase the WordPress website memory limit for your website. But before you try to learn how to increase the WordPress memory limit, you need to understand what it is and what’s the error associated with it.
What is a WordPress Memory Limit?
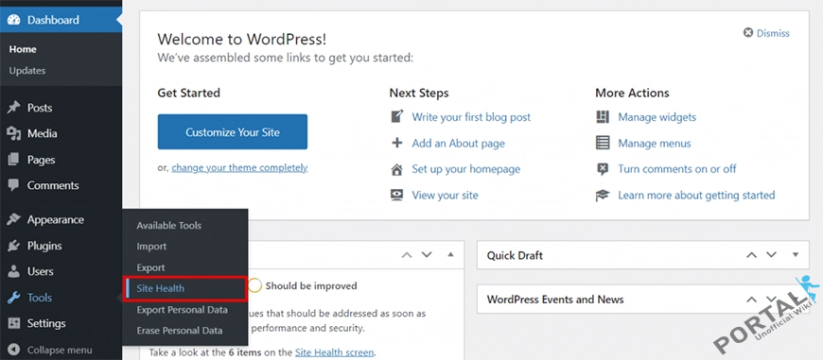
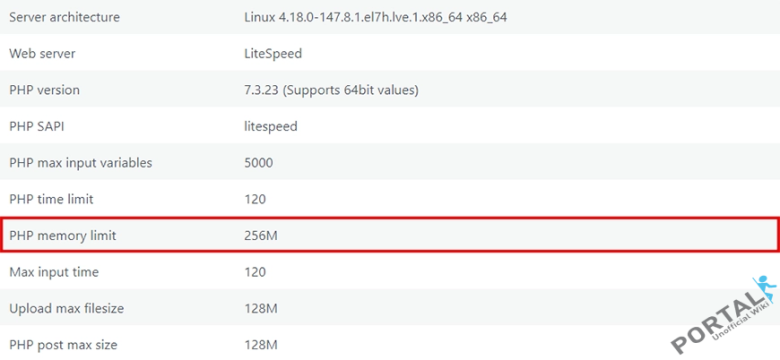
A WordPress Memory Limit refers to the maximum amount of system memory (RAM) that WordPress is allowed to use when running on a web server. The memory limit can be found in the “Tools” section of the WordPress admin dashboard. It serves as a safeguard to prevent WordPress from consuming excessive server resources, which could potentially lead to server crashes or poor website performance.
The default memory offered by WordPress is 32MB. However, WordPress needs more memory to store and process data when performing website tasks like running plugins or executing complex scripts. So, sometimes, the memory limit may be exceeded due to resource-intensive operations. In that case, you may see the message “Fatal Error: Allowed memory size exhausted”. That will cause your website to malfunction or even become temporarily unavailable.
Increasing the WordPress memory limit means allocating more memory to the CMS for handling larger media files, resource-intensive plugins, or extensive databases. In short, it allows WordPress to take care of complex tasks more efficiently and smoothly.
How to Check the Memory Limit in WordPress?
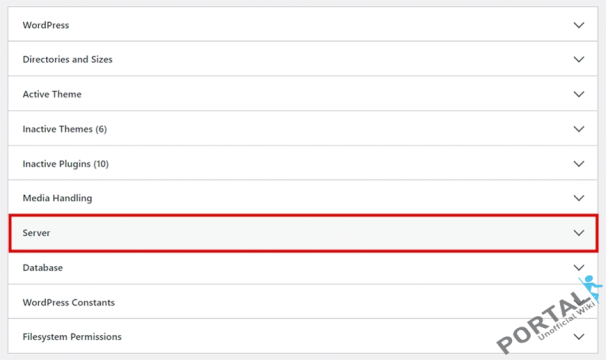
Checking the memory limit is quite easy with the easily-accessible WordPress admin dashboard. Here’s how you process before increasing the WordPress memory limit.
Step 1: Log in to your WordPress admin area.


